MechaCrypt: Hardware-Encrypted Messaging System
Abstract
Ever wondered how data actually moves across bus lines and tiny copper traces inside our electronics? MechaCrypt was built to make that invisible process physical. It demonstrates how the messages we send through apps are interpreted by a machine, processed, secured, and finally delivered to someone on the other side. Instead of using traditional electrical signaling through wire buses, MechaCrypt transmits information through a serial mechanical-actuation system, letting you see the data transfer process as it happens.
The system accepts a user message on the Sender side, encrypts it, and mechanically transmits the resulting ciphertext to the Receiver side, where it is decrypted only after arrival, mimicing the guarantees of end-to-end encryption. To enhance data security, MechaCrypt uses the MCU’s True Random Number Generator (TRNG) to generate a fresh cipher key for every block of data, mirroring real-world secure messaging protocols. All encryption and decryption operations are implemented directly on the FPGAs to ensure fast, hardware-accelerated processing.
Both MCUs parse and interpret the message using ASCII, the fundamental character-encoding standard in computing. The entire user experience is wrapped in custom web applications that allow two users to interact with the Sender and Receiver. Due to hardware constraints, MechaCrypt currently operates in simplex mode (one-way communication), but it fully showcases the flow of secure data transmission. An onboard LCD screen provides real-time feedback, showing the progress of each message as it moves through the system.
New Hardware
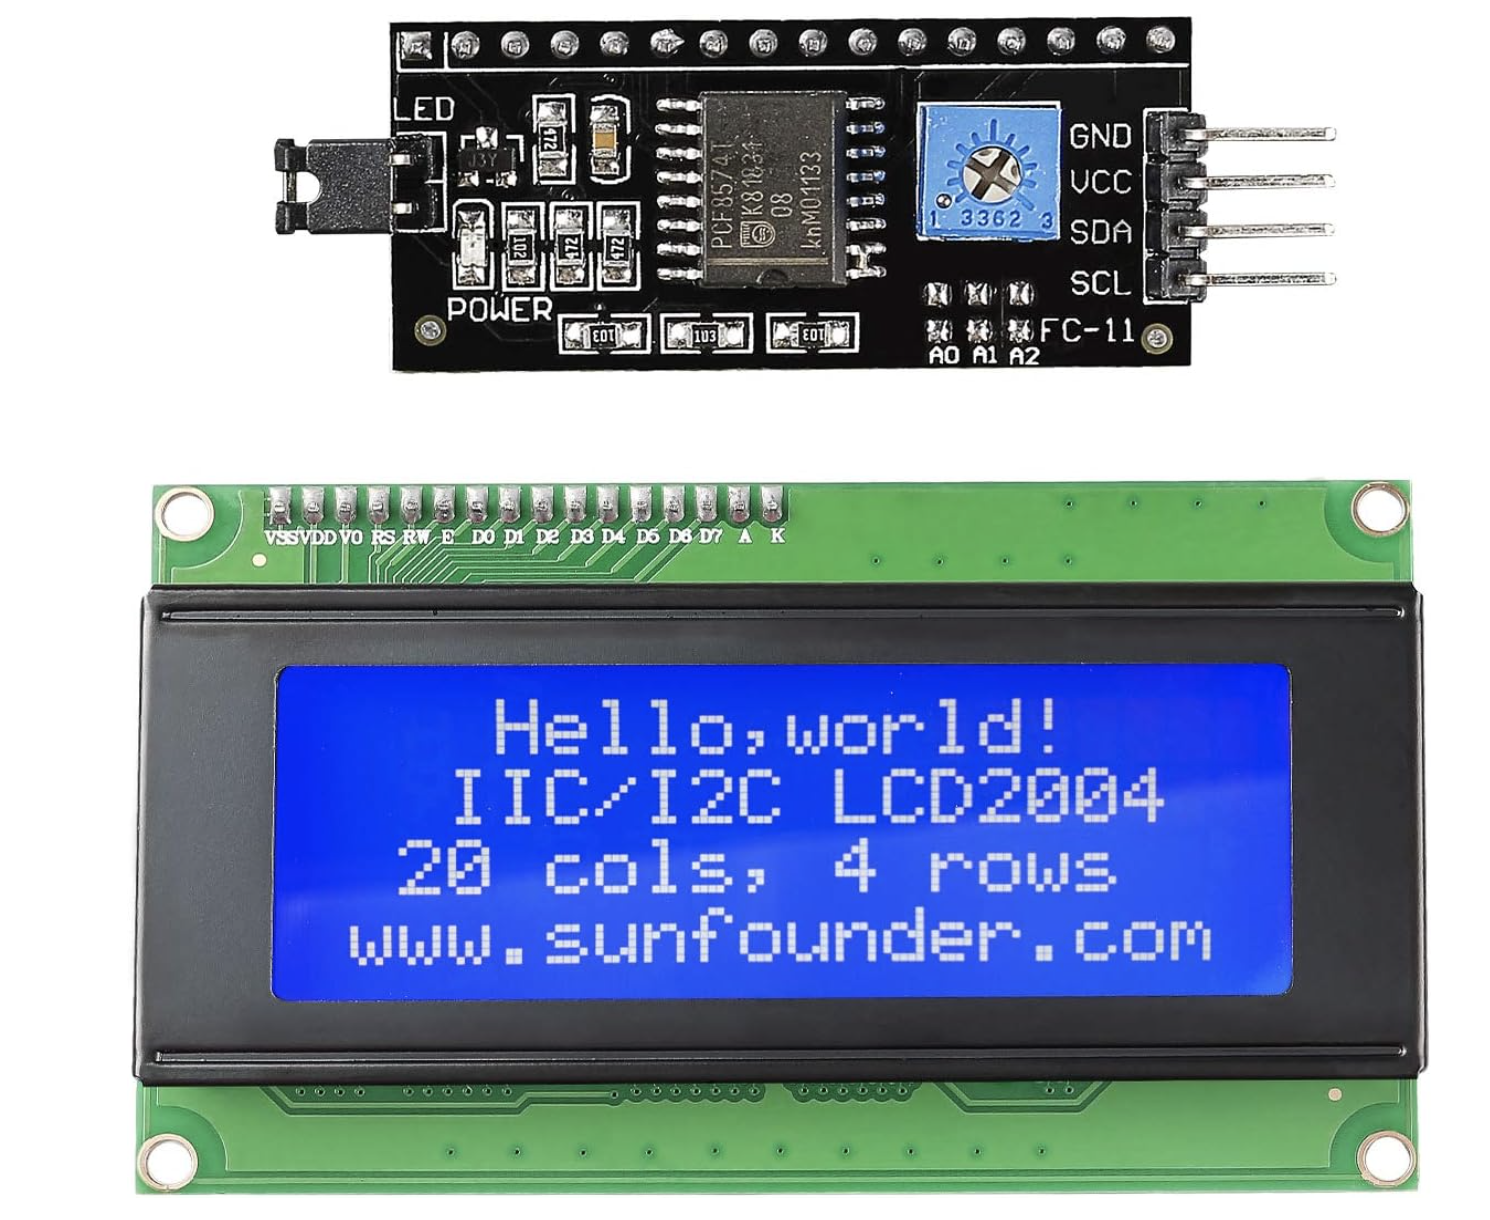
The new hardware that we will be implementing onto this project is the use of an LCD display. A traditional LED display requires 8 GPIO pins, which would use up a lot of the pins on our MCU, so we are using an I2C adapter for our 8 GPIO pins. In order to power our display, we will need to learn how to use and implement I2C on our STM32 Microcontroller to be able to display an text that we want onto the display.
System Overview
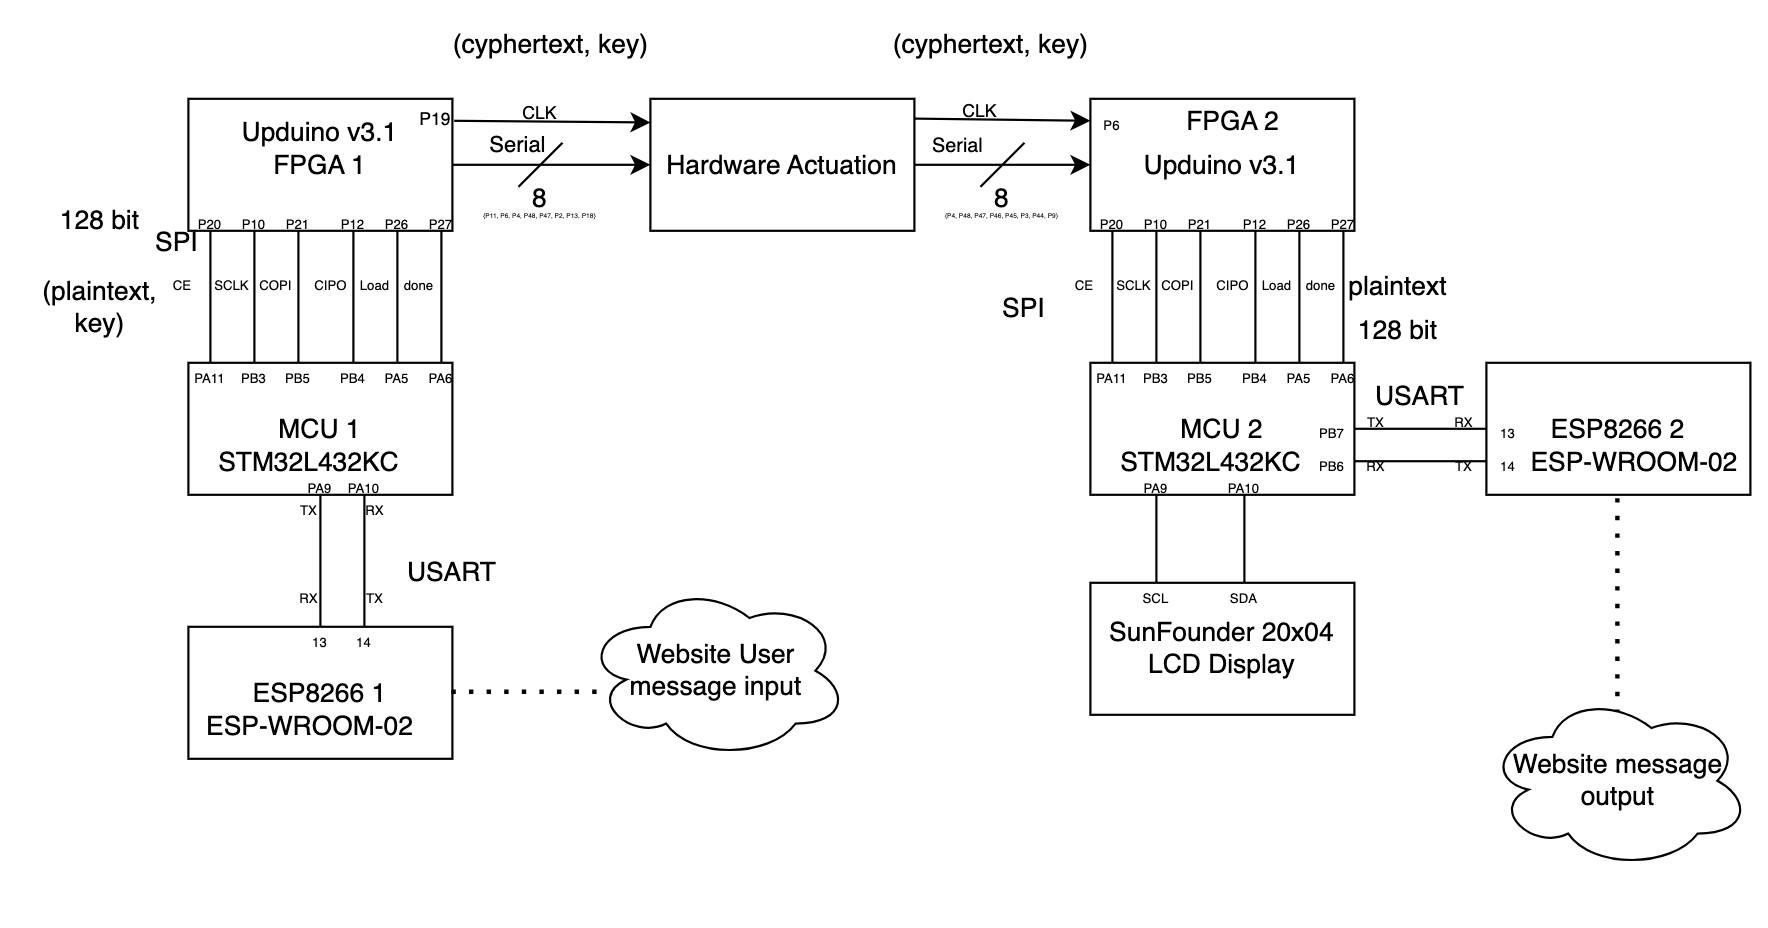
The applications on both sides of MechaCrypt are nearly identical, so most of the hardware is duplicated. Each side’s MCU acts as the primary controller: it manages the message flow, drives the inputs to its local FPGA, and handles all required communication protocols (USART, SPI, and I2C). The MCUs also process web requests through the ESP8266 modules, enabling seamless interaction with the custom web applications. Both MCUs collaborate to control the LCD display. The Sender MCU knows the total length of the outgoing message, while the Receiver MCU tracks how many characters have arrived. By exchanging this information, they coordinate the real-time progress updates shown on the LCD.
All the relevant elements defined in the description above are connected together following the communication protocols and setup in Figure 2 below:
Below is also a flowchart of how messages go from the user to receiver through our project in Figure 3:
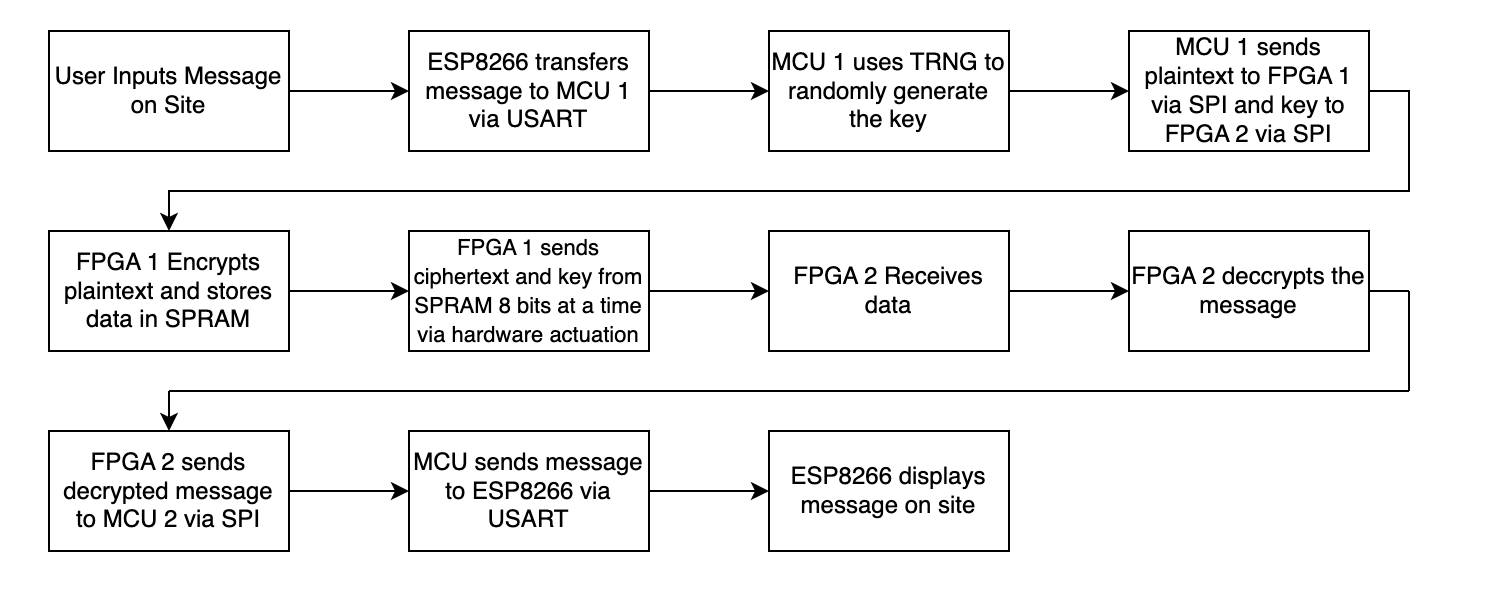
Table of Contents
For more information about the setup an implementation, check out the other resources and pages below:
AES Overview: Provides insight into AES as well as information on how to setup hardware-accelerated encryption and decryption on the UPduino 3.1 FPGA
- AES Encryption: Procedural demonstration on how to setup and configure, setup, and validate the AES-128 bit encryption pipeline.
- AES Decryption: Procedural demonstration on how to setup and configure, setup, and validate the AES-128 bit decryption pipeline.
FPGA Design: SPRAM configuration and usage, mechanical bit-level signaling, cross-side communication, and full AES encryption/decryption implementation.
MCU Design: USART, SPI, and I2C protocols, LCD control, TRNG, reading bits from the actuation, and ESP8266 Web requests and web server setup
Mechanical Design: A detailed walkthrough of the design and assembly of the mechanical actuation system.
Documentation: General circuit schematics, BOM, references, and acknowledgements.
Results: A presentation of the project’s outcomes, including test results, performance benchmarks, and an example communication.
Team: Self introductions about the team behind the project.